1. Download soSIMPLE Calendar Add-On
2. Install the Add-on
Double-click the file “soSIMPLE_Calendar_Addon.fmaddon”
This will open FileMaker Pro and install the Add-on.
Quit and re-open FileMaker Pro
NOTE (alternative method): It was reported that some earlier versions of FileMaker don’t properly support this installation method. So we’ve also included the source folder in this package. You can safely ignore these instructions if you’re able to proceed to step 3 after double-clicking the fmaddon file.
Place the folder into this folder:
Windows: c:\Users\<your user name>\AppData\Local\FileMaker\Extensions\AddonModules
(please note, the AppData folder is usually hidden in the Windows Explorer. Instead, go to your User folder and use the address bar to go to add to the path: “\AppData\Local\FileMaker\Extensions\AddonModules”)
Mac: /Users/<your user name>/Library/Application Support/FileMaker/Extensions/AddonModules/
(please note, the Library folder is usually hidden in the Mac Finder. Instead, use the “Go to Folder” menu item from the Go menu to go to “~/Library/Application Support/FileMaker/Extensions/AddonModules/”)
3. Open FileMaker Pro 19, layout mode and click the “+” button to add soSIMPLE Calendar Add-On to your file
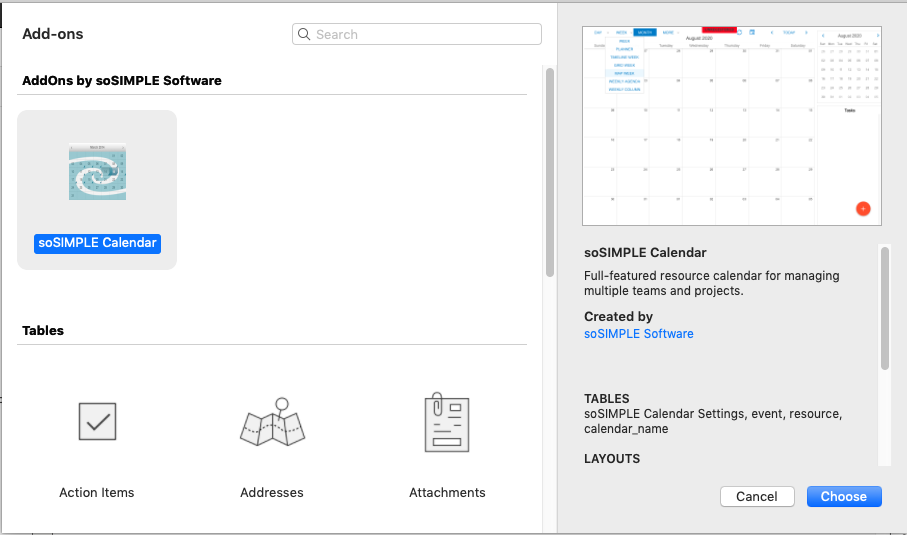
4. Drag the Add-on onto a new layout
Congratulations – you have successfully installed soSIMPLE Calendar into your custom app.
You can start using soSIMPLE Calendar right away by dragging events, double-clicking events, and navigating around the calendar.
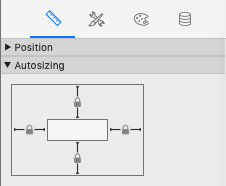
Just one thing – Anchoring
We highly recommend anchoring the calendar so that it stretches with the window. This aspect of the web viewer is not included when you drag the Add-on on to your layout.
Start by ungrouping the two web viewers and the gear button. Then anchor the calendar web viewer on all four sides, and the calendar selector web viewer on the left, top and bottom.